

I was so jazzed after my sister's shower yesterday that I woke up this morning and immediately started working on my own decorations. Ok. That's not entirely true; I procrastinated a bit and pinned around 80 things on Pinterest to my baby shower board. But, I eventually got around to it, and decided to be extra frugal on the big table decorations. Here is what I cooked up for extending the length of four long tables:
I like these because they look like Truffula Trees (from The Lorax). I chose the aqua and orange because those are the major colors of our baby shower.

You Will Need
- Tulle Spools (These are 6" x 25 yards, 1 spool = 6 pom poms)
- Scissors
- Floral Wire
- Wooden Dowels
- Scrapbook paper
- Ribbon or other embellishments
- Hot Glue Gun
Directions
Start by making a pom-pom out of your tulle. I used my hand as a guide (which resulted in approximately 3" poms) and wrapped the tulle around it about 15-16x.


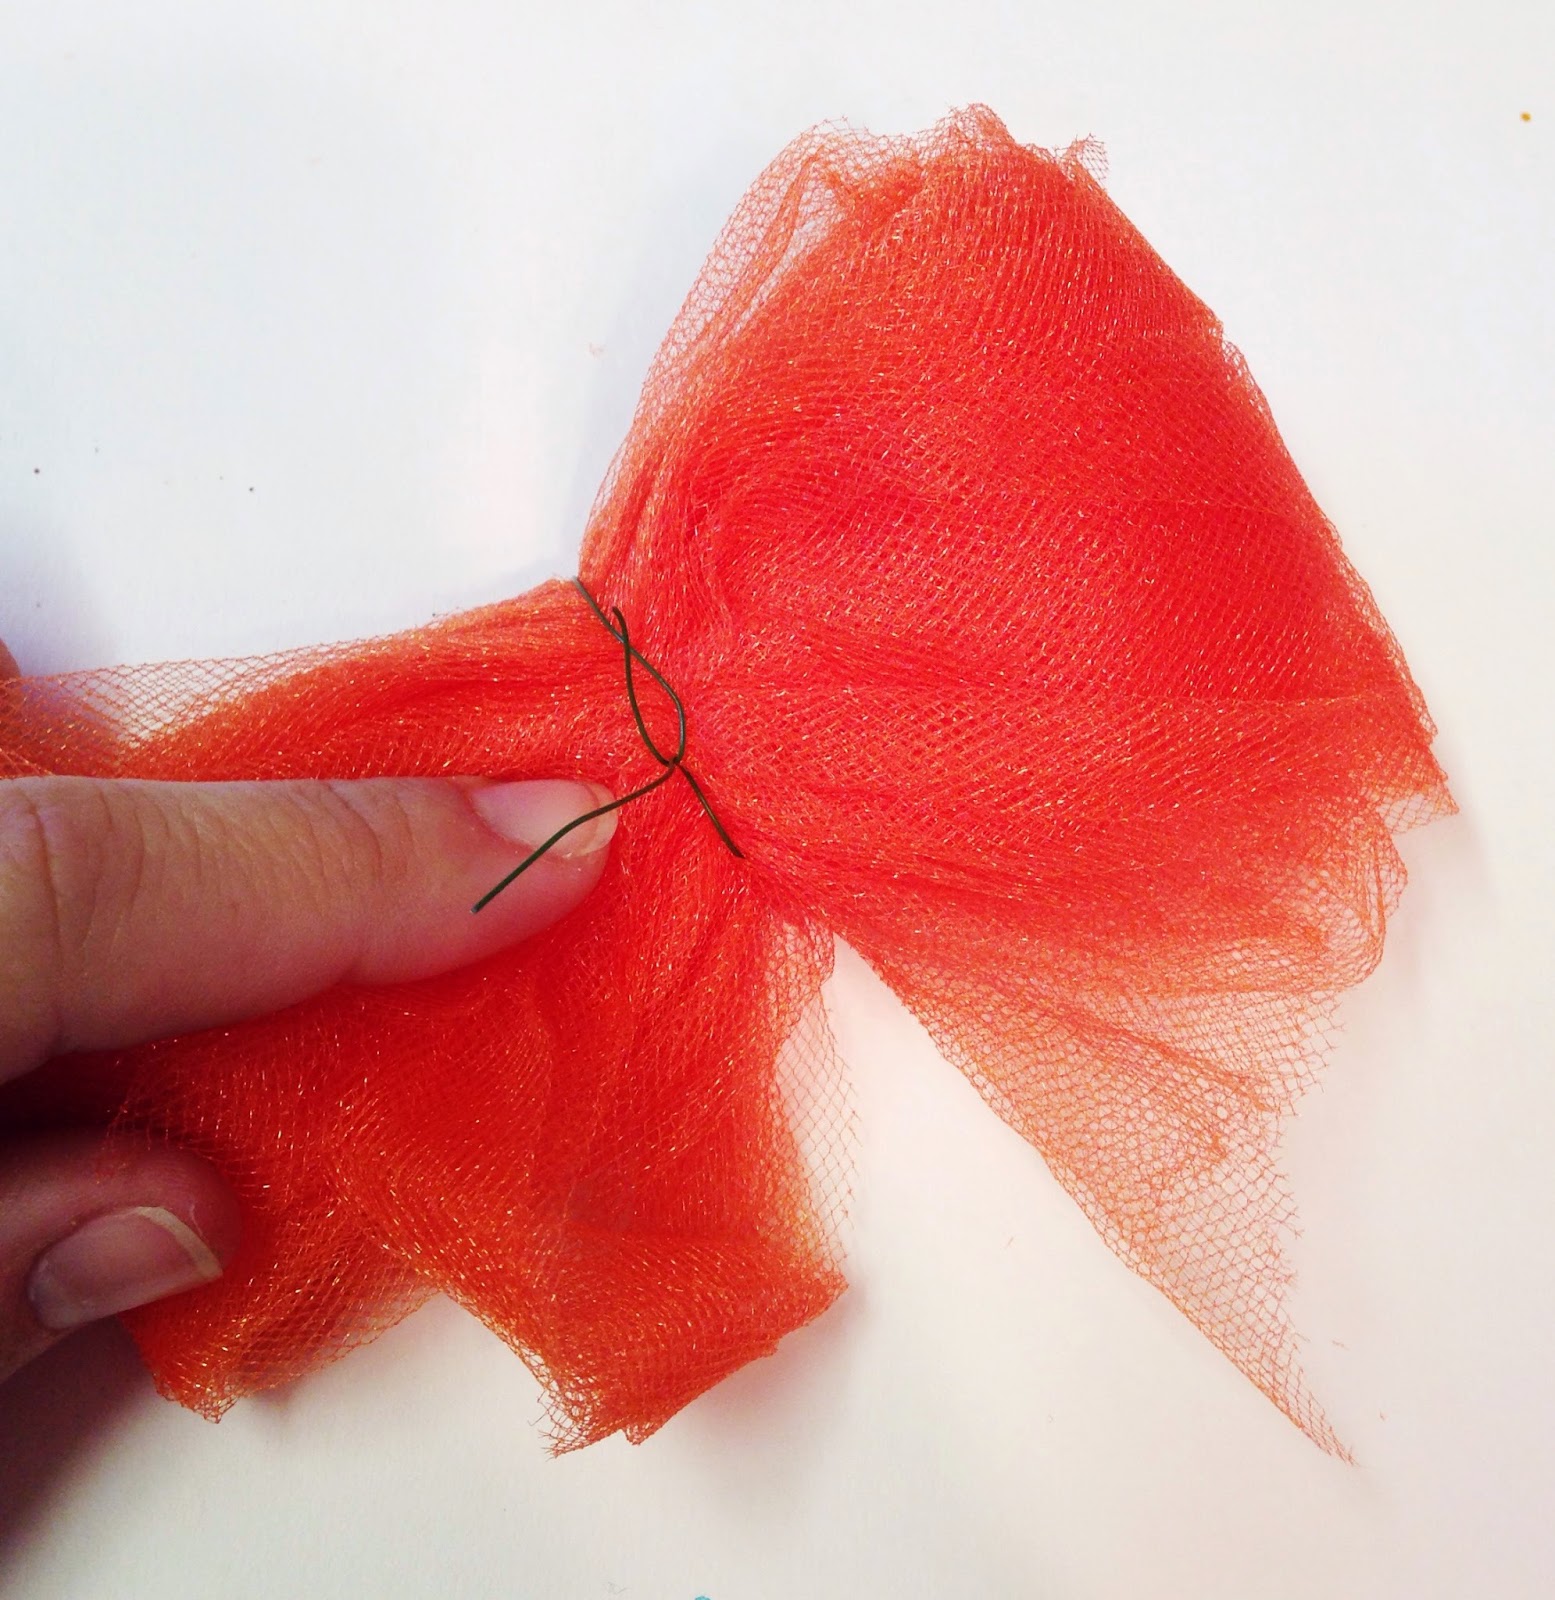
After you have wrapped your tulle around, gently slide it off of your hand. Use a piece of floral wire to secure the tulle in the middle of your big loop. Twist as tightly as you can; the tulle will hide the color of the floral wire (even white). It will look like a bow. My wire here is loose, but I tightened it up with my needle-nosed pliers.
Then use your scissors to clip the end loops; your tulle will automatically fluff out. It can be a little difficult to get your scissors through there, so I had to go back through my poms and clip any rogue loops of tulle.

Now do the other side. After you cut the other side, you'll want to even up any edges that are sticking out longer than the others. Just fluff the individual pieces of tulle around to make a ball shape for your pom. It should look like this:

Now, take your dowel rod and hot glue it in the middle of your pom pom to make a flower. You could even cover the dowel with washi tape to make it more festive!

There you have it: mini-Truffula Tree. Or fairy wand. Or, in my case, adorably strange pom flower. But I wanted mine in some sort of arrangement, so I decided to take my frugality a step further by using the cardboard tube that the tulle comes rolled on. (It'll take you about 6 poms of this size to use up an entire tube of tulle) If you'll notice, there are plastic feet on either end of the cardboard roll; you'll want to go ahead and pop one of those guys off. Leave the other on because it will stabilize the tube. We're going to use this as a vase!

I covered my tube with scrapbook paper, cut into a 6 x 6 square (and it fit perfectly). But you could use anything you like; fabric would look really nice. I added a piece of white burlap ribbon with a layered skinny ribbon over the top for more embellishment. To glue these down, I just used my glue gun.

Tah-dah! Cute, bright centerpieces on the super cheap! Also, if you're planning to put these outside, weight the bottom with a rock to keep your pieces from falling over or blowing away!
*I made the sign at the top of this post; if any of you would be interested in a tutorial on that, please let me know and I'd be happy to put one together. It took me about four hours, so it's a pretty lengthy project, but I know you can do it!* Thanks so much for stopping by the blog today. I'm sure there will be a lot more tutorials on baby shower decor coming up, so brace yourselves. As always, feedback and comments are greatly appreciated. Have a wonderful day.
xo, Karee
No comments:
Post a Comment