For the past 24 hours, my house has been in a state of utter disarray. Saturday is my sister's baby shower to celebrate her third daughter (sweet little Kloe) and I've been a busy bee making all sorts of frilly things for her. Being the mother of (soon to be) two boys, this is an entirely new avenue for me. Honestly, I love having boys, but I have a secret deep desire to have a daughter of my own one day (I think!). Until then, though, I'll be happy to make bows and tutus and all sorts of bedazzled goodies for my four beautiful nieces. I really get the best parts; making all the fun stuff and playing dress up and then getting to avoid the diva meltdowns! Regardless, crafting for little girls is so much fun. I have a hard time understanding how people can have daughters without crafting because boutique stuff is so expensive! Rather than shelling out $12 per bow at my local boutique, I chose to make
some for my newest niece and I thought I'd share the basic process with you. They are surprisingly easier to make than you'd think, but I'm lucky enough to have a pretty fat ribbon stash so that made it much easier (I'm a craft hoarder).
Now we start the layering process. Crisscross your ribbon and this will be your basic frame to follow. Then, pick your next ribbons and cut them accordingly, remembering to finish the ends. I like mine to be slightly smaller than the back ribbon, just to make sure that you can see all of the patterns.
You can then start layering these on top of your other ribbon. As your stack grows, it can get difficult to keep it all straight and still, so I like to dab a small dot of hot glue in the middle of each layer to keep it all together and settled.
While you're pinching the middle together, wrap your wire around the bow, securing it tightly in the back. The reason I use floral wire instead of regular wire is because you can wrap floral wire very very tightly without it weakening and snapping. You'll want to move your ribbon around and play with it until you're satisfied with the way it looks before wrapping your wire very tightly. Then snip off the excess!
Now, do the other set the exact same way.
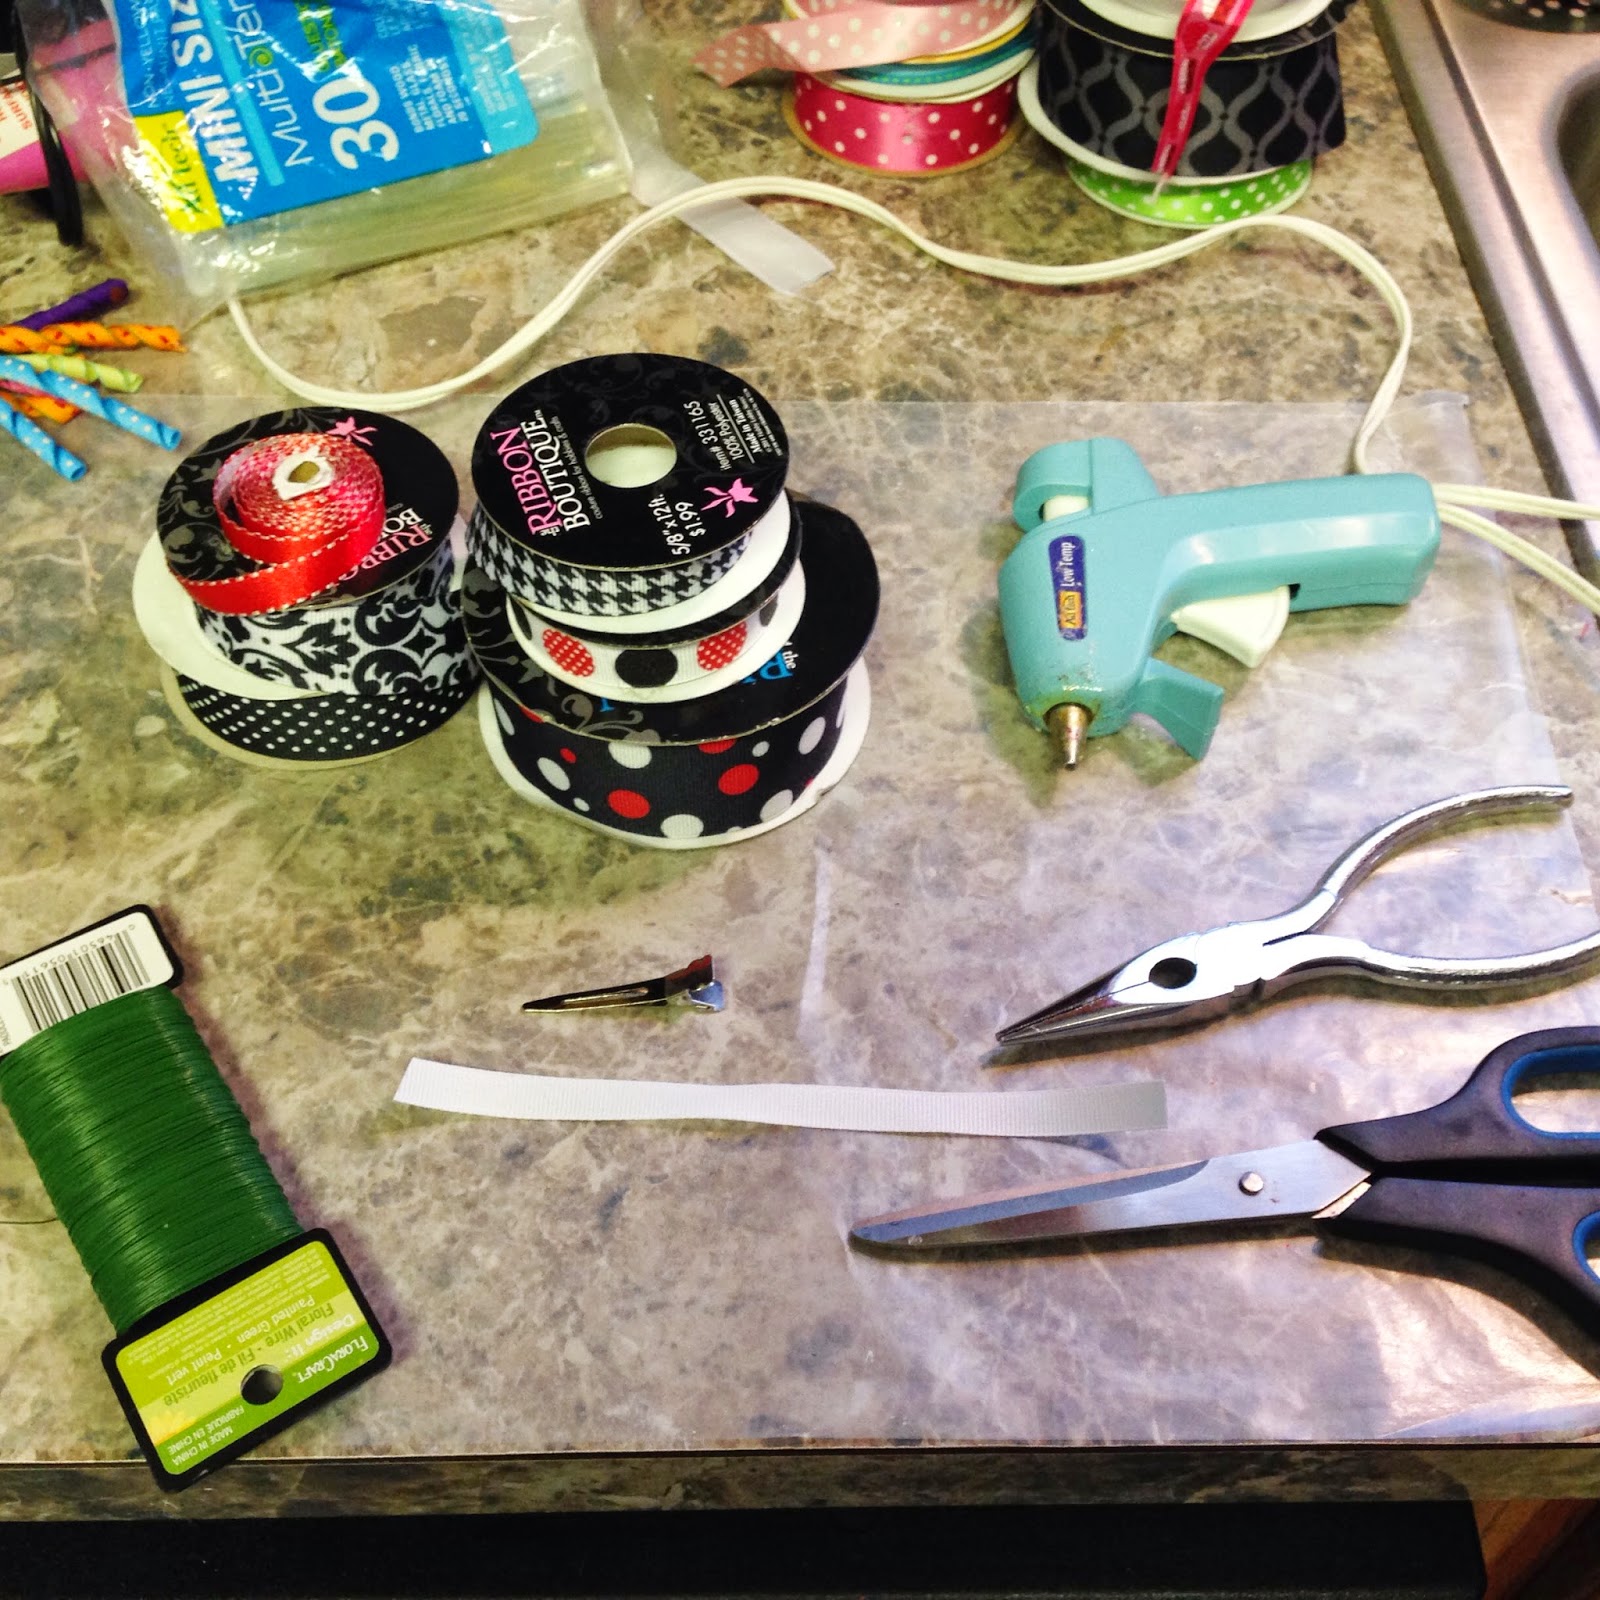
You Will Need
- Ribbon (I used 6 different styles/colors)
- Scissors
- Hot Glue Gun
- Alligator Clip (or any hair clip of your choice)
- Floral Wire
- Needle Nose Pliers
- Embellishment for the center (Optional, but adorable)
Please pardon my cluttered workspace. This tutorial was shot on bow #13.
Who am I kidding; I'm not OCD. I'm a clutterbug.
Directions
Ok! Let's get started making these beauties! I covered my counter with wax paper because I do not trust myself with hot glue. It's best to lay your ribbon out and decide which pattern you want to be the backbone of your bow. I like to play around with the arrangement before I ever start cutting, just to get an idea of how I want to stack my pieces. It's best to start with your widest ribbon at the back. For reference, here are the widths and patterns of my ribbons:
Obviously I chose to make the bottom ribbon my backing ribbon. I think having a variety of widths adds a lot of depth and visual interest to your bow. So, you're going to want to lay your ribbon flat and cut two lengths. (Normally I don't measure, well anything, but I laid a ruler down so you could get an idea of roughly what size to start with).
After you cut your ribbon lengths, let's make some fancy ends! Fold your ribbon in half and cut it on the diagonal. Your finished ends will look like this.
Now we start the layering process. Crisscross your ribbon and this will be your basic frame to follow. Then, pick your next ribbons and cut them accordingly, remembering to finish the ends. I like mine to be slightly smaller than the back ribbon, just to make sure that you can see all of the patterns.
You can then start layering these on top of your other ribbon. As your stack grows, it can get difficult to keep it all straight and still, so I like to dab a small dot of hot glue in the middle of each layer to keep it all together and settled.
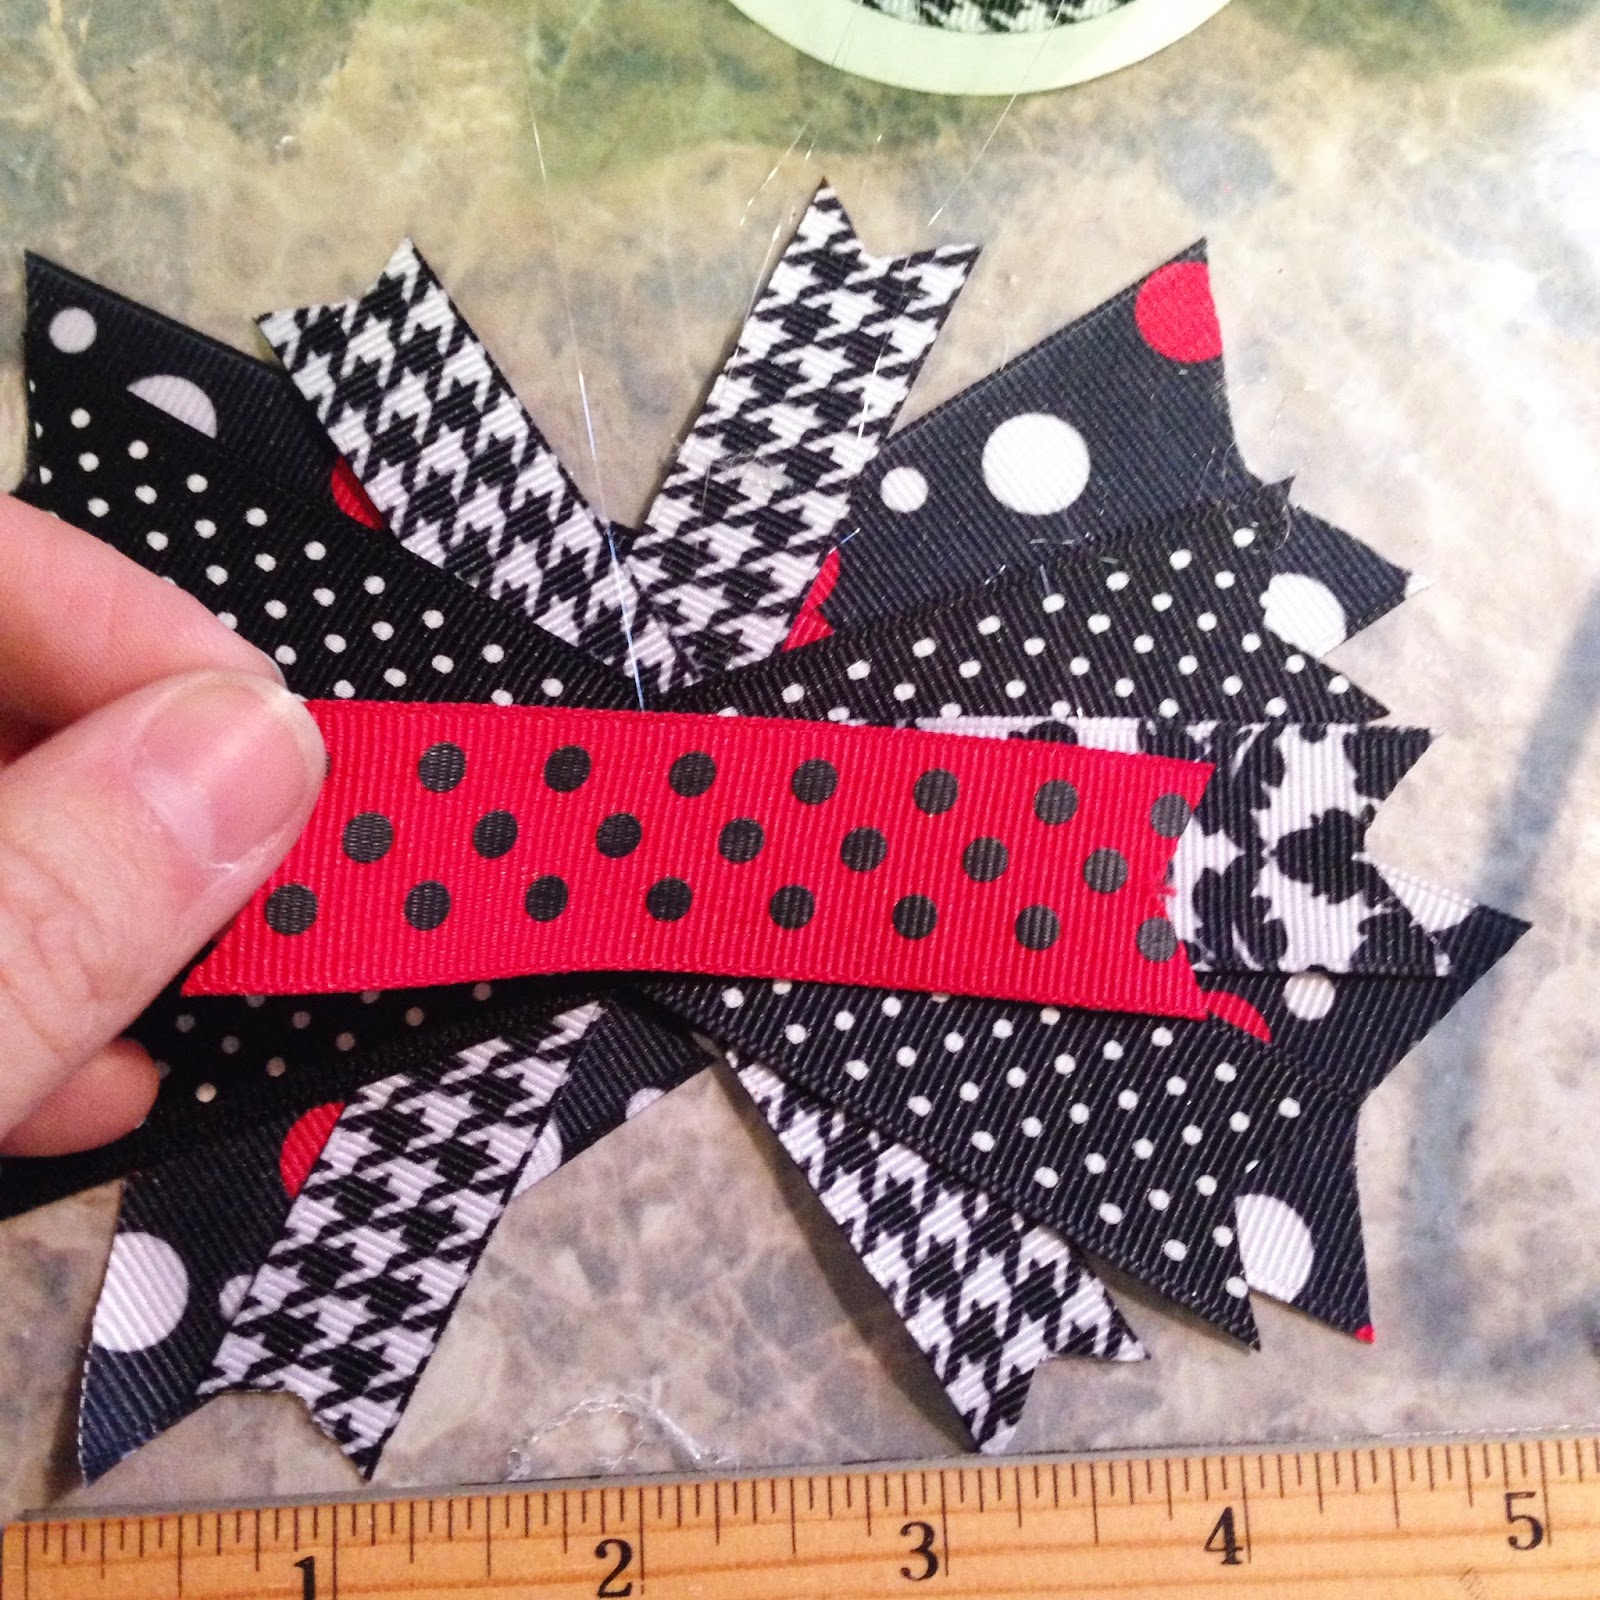
You can add as many layers as you want. I've been told "The bigger, the better" on the bow front, so I'm going to assume that there is some validity to that! Just bear in mind that it will be hard to gather if you layer too thick. I did about four layers for mine and this is how it looked. I normally add one length of ribbon horizontally in the middle for an added pop (in this case, the black and red polka dot scrap I had leftover from a previous bow).
It's starting to look like a bow right?! Now, let's gather the middle. This will add some stiffness to the bow and help it hold its shape. To do that, just pinch the middle together with your fingers (I added a dab of glue to help me hold it (I just couldn't simultaneously take a picture because I was using both hands).
While you're pinching the middle together, wrap your wire around the bow, securing it tightly in the back. The reason I use floral wire instead of regular wire is because you can wrap floral wire very very tightly without it weakening and snapping. You'll want to move your ribbon around and play with it until you're satisfied with the way it looks before wrapping your wire very tightly. Then snip off the excess!
Your bow will look something like this when you flip it over.
Now, this makes a cute bow all by itself. Just wrap a piece of extra ribbon around the center and secure a clip to the back. However, my sister's desire was to have a wall of ridiculously big bows for baby Kloe. So, we still have a few layers to go!
To make a loopy middle layer, cut four lengths of varying ribbon. I used two styles of ribbon; you could use four different ones or all the same...whichever you prefer.
Now, twist your ribbon into a figure 8; you will also want to secure the ends with hot glue.
Now, do the other set the exact same way.
Criss-cross your matching ribbons to make swirly circles. (You see where this is going now, huh?) Then layer the swirly circles to make the center piece.
Secure your swirly center onto your bow and glue it down! I thought it needed an extra something, so I used a sparkly dot for some extra interest in the center (buttons are adorable, too!).
You can take this time to trim up any uneven ends. I actually hadn't noticed how uneven my polka dots were until I was editing these photos, so I'll go back and do that in a bit. After your ends are just the way you like, run an open flame along the edges to prevent raveling.
The very last step is attaching the clip. I cover my alligator clips with ribbon for babies to protect their super soft baby heads. It only takes a few extra seconds and mommies will really appreciate that you took the time to think of baby safety without compromising style.
I use hot glue to hold the ribbon to the clip and have never had a problem with it coming undone. Then center it and glue it to the back of your ribbon and BAM (!!!) you're finished with one super-cute baby shower gift!
Ta-dahhh!!!!!
Here are some variations with different colors and some slight differences with the layering process:
Looped Bow
Tails-Down Bow
Layered Corkscrew Bow
I hope this tutorial was helpful for you mamas that want to glam up your littles without breaking the bank. In reality, I have been making bows for several years, but it takes a very limited time to get the hang of it. I think this project would be great for a Pinterest party or a girls craft night because (unless you have a ridiculous ribbon stash on hand) ribbon can get pricey. Also, if you buy spools specifically to make one bow, you are going to end up with enough ribbon to make 6 of the same bow. For that reason, I think it would be great for a craft party; everyone could bring different ribbon and you could mix and match! I'd love to hear some feedback on this project and will try to reply as quickly as possible. Thanks so much and have a lovely day!
xo, Karee


No comments:
Post a Comment